Woodworking Projects: Easy DIY Guides & Step-by-Step Plans
Build with Confidence: 3 Beginner Woodworking Projects Under $50 in Tools

Woodworking is a fantastic hobby that can turn into a rewarding skill. With just a few essential tools, anyone can start creating beautiful and functional pieces for their home. Whether you’re a complete beginner or looking to refine your skills, woodworking offers a unique blend of creativity and practicality. This post will guide you through three exciting projects you can tackle with tools that won’t break the bank.
Essential Tools for Your Woodworking Journey
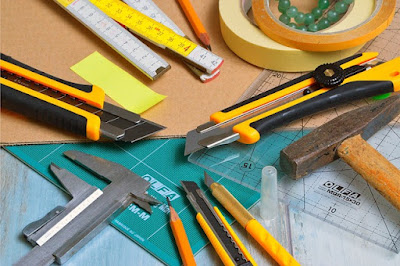
Before diving into projects, let’s talk about the tools you’ll need. Many quality tools are available for around $50 that can serve you well as you start your woodworking journey. Here’s a brief overview of essential tools for beginners:
- Circular Saw: Perfect for making straight cuts on various materials.
- Drill: A versatile tool for drilling holes and driving screws.
- Measuring Tape and Square: For precise measurements and ensuring accuracy in your cuts.
If you're looking for essential tools for woodworking, you can find a comprehensive guide here.
Project 1: DIY Smart Saw Stand
Introduction to the Project
A smart saw stand enhances your woodworking experience by providing stability and safety while you work. This project is an excellent starting point, allowing you to familiarize yourself with basic cutting and assembly techniques.
Tools and Materials Needed
For this project, you will need:
- Circular Saw
- Drill
- Measuring Tape
- Wood (1x4s or 2x4s)
- Screws and wood glue
You can find various woodworking plans to help you build your smart saw stand here.
Step-by-Step Instructions
- Measure and Cut Your Wood: Use the circular saw to cut the wood to the desired lengths for the stand.
- Assemble the Frame: Drill holes and screw the pieces together to form a sturdy frame.
- Add Support: Use additional wood to create support for the saw.
- Finish: Sand any rough edges for a smooth finish.
Tips for Customization and Optimization
Feel free to personalize your saw stand with features like additional storage or adjustable height to suit your workspace.
 |
| Advertisement |
Project 2: Versatile Wooden Storage Box
Overview of the Storage Box Project
Creating a versatile storage box is a practical way to organize your space while adding a decorative element. This project can be adapted for various uses around the home.
Required Tools and Materials
For the storage box, you will need:
- Circular Saw
- Drill
- Wood (1x6s or plywood)
- Screws and wood glue
For a guide on the necessary tools for woodworking, check out this link.
Detailed Building Instructions
- Measure and Cut: Use the circular saw to cut the wood into pieces for the box's base, sides, and lid.
- Assemble the Box: Drill and screw the pieces together, ensuring everything is square.
- Add a Lid: Cut an additional piece for the lid and attach it using hinges.
- Finish: Sand and finish the box as desired.
Finishing Touches: Paint and Stain Options
Consider using paint or stain to match your home decor. This not only protects the wood but also enhances its appearance.
Project 3: Simple Outdoor Bench
Concept and Design of the Bench
An outdoor bench is a great addition to any patio or garden, offering a comfortable place to relax. This project will teach you about constructing sturdy furniture.
List of Tools and Supplies
You’ll need:
- Circular Saw
- Drill
- Measuring Tape
- Wood (2x4s or pressure-treated lumber)
- Screws and wood glue
Discover various woodworking plans and free resources here.
Comprehensive Building Steps
- Measure and Cut the Wood: Cut the wood into appropriate lengths for the seat, legs, and supports.
- Assemble the Bench: Use screws and wood glue to secure the pieces together.
- Finish: Sand the edges and apply a weather-resistant finish.
Optional Features for Added Comfort
Consider adding cushions for extra comfort or using treated wood to withstand outdoor elements.
Crafting with DIY Smart Saw Plans
Introduction to Smart Saw Technology
Smart saws improve precision and efficiency in woodworking projects. They can be an invaluable addition to your workshop, making cuts faster and more accurately.
How to Create Your Own Smart Saw Plans
Consider factors such as wood type, size, and intended use when designing your smart saw plans. For more on smart saw options, visit this link.
Tips for Successful Woodworking on a Budget
- Time-Saving Techniques for Beginners: Organize your workspace and plan your projects ahead of time to maximize efficiency.
- Creative Ways to Source Materials: Look for reclaimed wood or visit local suppliers to save costs.
- Maintenance and Care for Your Tools: Proper maintenance can extend the life of your tools. For more tools, check out these woodworking tools on Amazon.
Conclusion
In conclusion, these three projects are a fantastic way to start your woodworking journey with budget-friendly tools. You’ll gain valuable skills while creating functional and beautiful pieces for your home. Don’t hesitate to share your experiences and finished projects!
Related Articles:


.jpeg)

.jpeg)
